| View previous topic :: View next topic |
| Author |
Message |
kid

Joined: 11 Jan 2010
Posts:
Location: Bells Beach
|
 Posted: Sat Apr 16, 2011 11:28 pm Post subject: Variable Flex Paipo Posted: Sat Apr 16, 2011 11:28 pm Post subject: Variable Flex Paipo |
 |
|
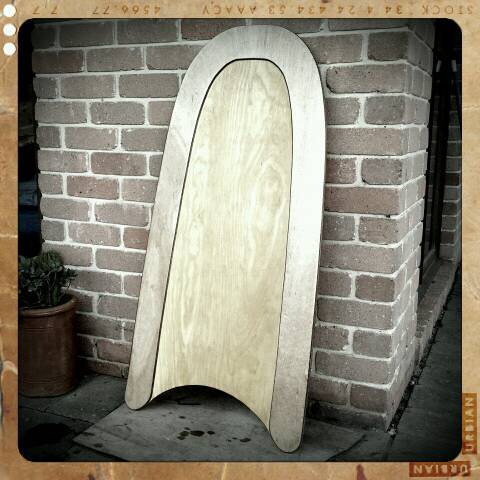
I've been tripping out on the speed of the wide, flat paipo's, in particular, their ability to race through sections that break too fast for any other type of board. This has led me to notice that their weak point is when they lose their hold when shooting through a steep section. I re-read the Tom Wegener interview, and I dragged out a few of my favourite alaia's and paipo's. I looked at the ones that ride in a steep pocket the best and I found that these all had rolled bottoms. The concave ones work well too, but the rolled ones were definitely the best. I have made a couple of finned paipo's and these hold brilliantly, but they are not nearly as fast as the finless, wider boards. So I started to work out a way to make a board which I could flex laterally, to create a rolled bottom, but which would snap back to being flat when I wanted to accelerate. Here's my first attempt at this idea. I copied my favourite flip-nose paipo, and I made the nose a touch wider. I used 9mm ply, instead of my usual 12mm. I then added a 6mm rib around the perimeter (not across the tail) and I used the thickness around the rail to sand in a subtle roll up to the sharp edge, the whole way round. The idea is that as I'm trimming along, I'll have my hand on the outside edge. As the wave gets steeper, I pull up on the outside rail, flexing the thinner centre of the board, which will create a roll through the back half. This should create some suction, and therefore hold. When I'm through the section, releasing the rail will flatten the board back out, which should cause it to accelerate dramatically. The board is still a couple of coats of sealant away from a test-ride. But I'll write up a report as soon as I've had a good run on it!
_________________
"It's not a beer-belly, it's a displacement hull"
www.deluxepaipo.com |
|
| Back to top |
|
 |
mrmike

Joined: 06 Sep 2007
Posts:
Location: coronado, ca
|
 Posted: Sun Apr 17, 2011 4:25 pm Post subject: Posted: Sun Apr 17, 2011 4:25 pm Post subject: |
 |
|
I made one kindof like that but used 1/4' ply on the bottom and 1/2" ply for the rim and it cracked I should of used 1/2" all around 
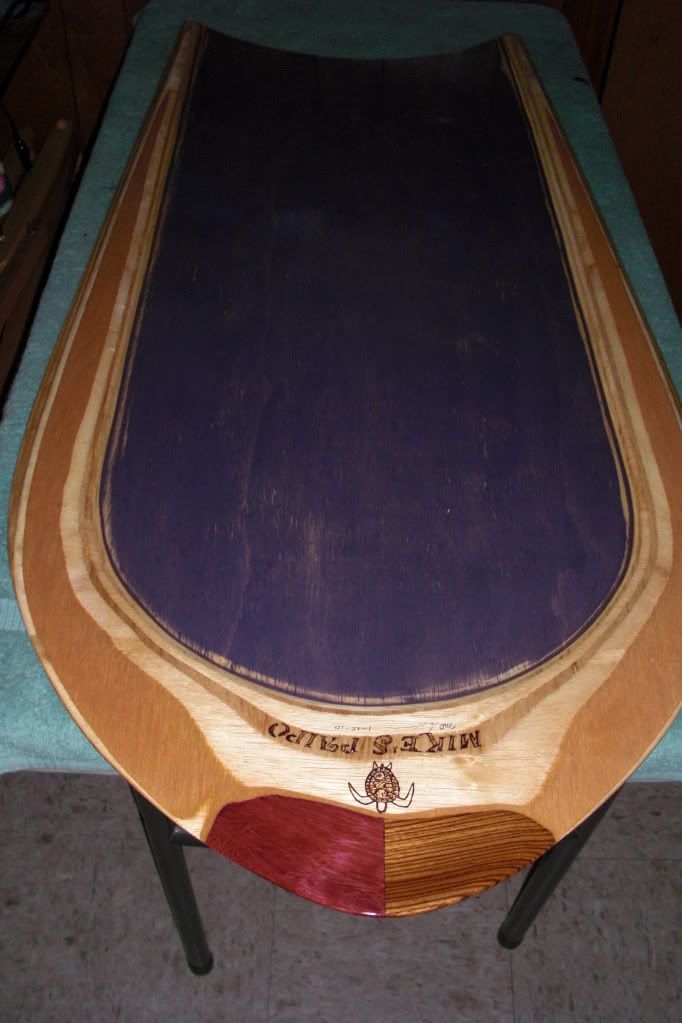
_________________
PAIPO ON
blog http://mrmikespaipos.blogspot.com |
|
| Back to top |
|
 |
Spudnut
Joined: 30 Jan 2011
Posts:
Location: Ventura, Ca
|
 Posted: Sun Apr 17, 2011 10:56 pm Post subject: Posted: Sun Apr 17, 2011 10:56 pm Post subject: |
 |
|
Kid,
What are the dimensions of this board? Please post progress too. |
|
| Back to top |
|
 |
kid

Joined: 11 Jan 2010
Posts:
Location: Bells Beach
|
 Posted: Mon Apr 18, 2011 4:13 am Post subject: Posted: Mon Apr 18, 2011 4:13 am Post subject: |
 |
|
This one is 4ft long and I kept the tail at 24 inches, but I widened the nose out to 21 inches (12inches from the tip) It has very straight rails and the bottom is pretty much flat. Now that I'm up to the 3rd coat of urethane, I'm wondering if I should have used the 9mm ply for the rails and the 6mm for the bottom "skin". It feels stiffer than I predicted, but I'll wait till I hit the water before I run out and build another one just yet! I'm pretty excited about testing this one. If it doesn't flex the way I'm imagining, I might make another one with the rib in two halves, with a gap at the nose. This might act like a "hinge" allowing the bottom to flex the way I want.
_________________
"It's not a beer-belly, it's a displacement hull"
www.deluxepaipo.com |
|
| Back to top |
|
 |
mrmike

Joined: 06 Sep 2007
Posts:
Location: coronado, ca
|
 Posted: Mon Apr 18, 2011 10:00 am Post subject: Posted: Mon Apr 18, 2011 10:00 am Post subject: |
 |
|
mine had the gaps after it cracked  I thaught of sawing 1/16" gaps at every 6" then I thought it might pinch my skin when it flexed? I thaught of sawing 1/16" gaps at every 6" then I thought it might pinch my skin when it flexed? 
_________________
PAIPO ON
blog http://mrmikespaipos.blogspot.com |
|
| Back to top |
|
 |
RNT808
Joined: 11 Sep 2007
Posts:
Location: Makawao Maui
|
 Posted: Mon Apr 18, 2011 4:06 pm Post subject: Posted: Mon Apr 18, 2011 4:06 pm Post subject: |
 |
|
Iíve always found that having vertical flex in a board is very helpful when attempting to get into the wave early. Being able to push the nose down and bend the board into the wave allows me to catch waves that with a stiffer board I might otherwise miss. So I like it. On the other hand I find that controlling that flex while on the wave can be somewhat problematic, especially when it comes to achieving and maintaining speed.
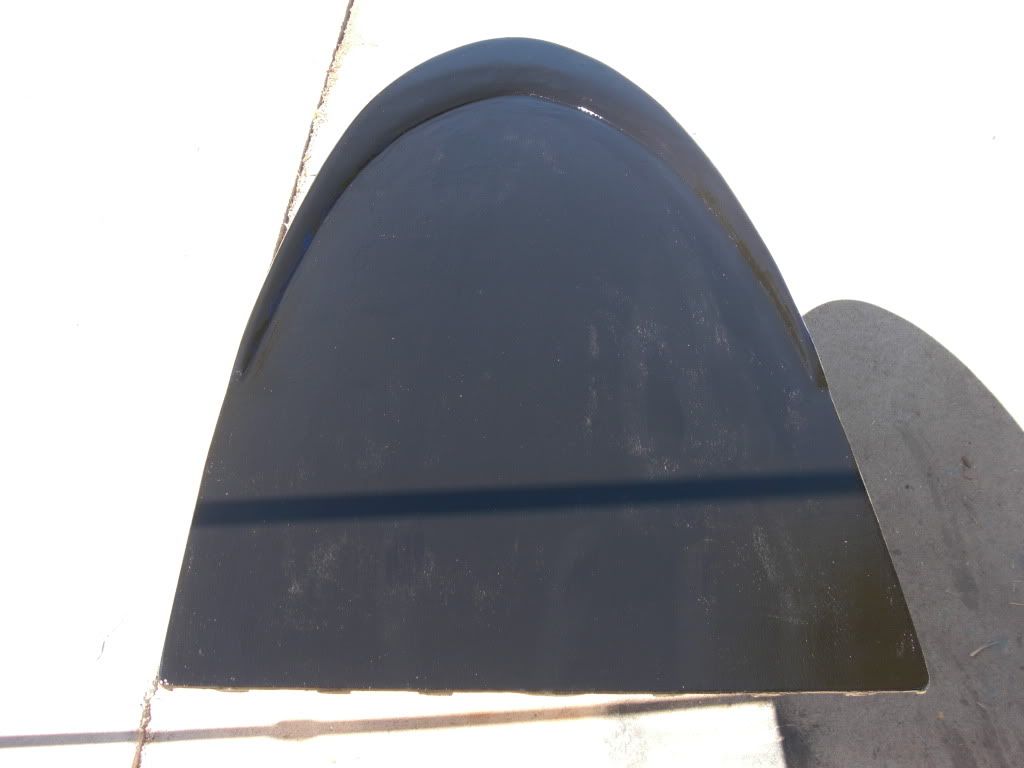
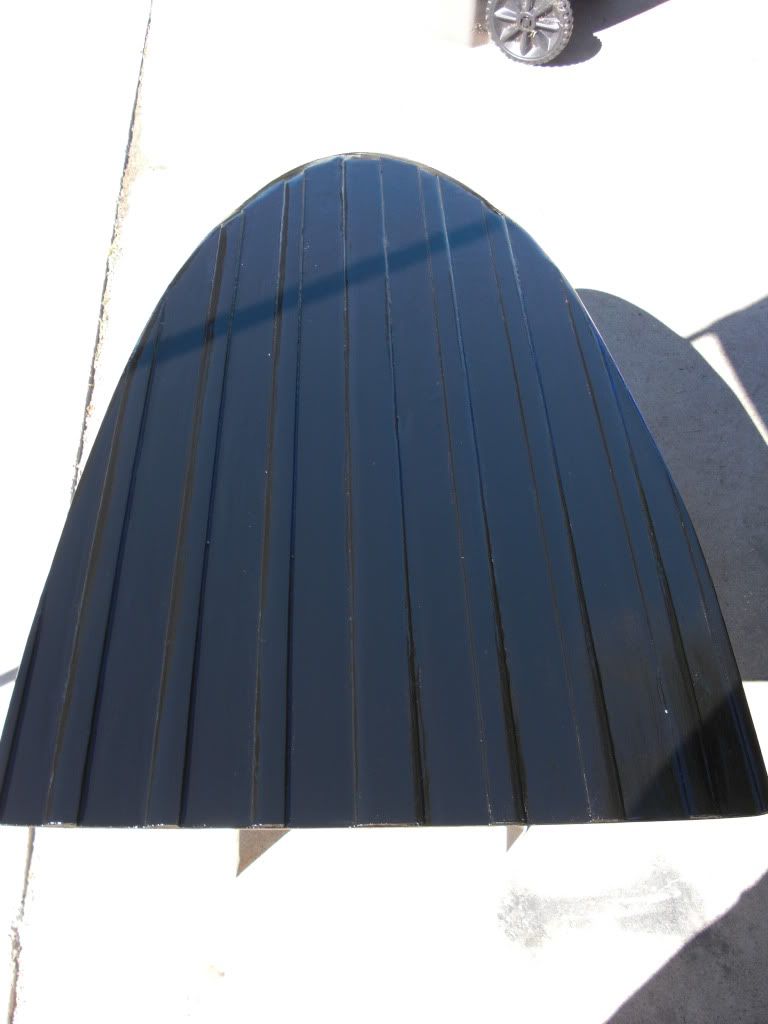
With that in mind I set out to build something that would give me that flexibility in the front portion of the board that I wanted while retaining rigidity in the main body and tail section. I sought to accomplish this by laminating two 5mm pieces of birch ply together to form the body of the board and then adding two additional pieces of 5mm starting about 12 inches back from the nose and running along the rails to the tail of the board. This left me with a board that is 46 inches long, 10 inches wide at 6 inches from the nose, 17 inches at 1 foot, 23 inches at the wide point (15 inches from the tail) and 21 inches at the tail.
The 2 pieces I added follow the rail on the outside and are dead straight on the inside giving me a 14 inch wide flat bottomed channel running from 1 foot from the nose to the tail. This channel is 10mm thick and the rail area is 15mm. The finished board has the flex I was looking for in the nose, is good and stiff through the body and as an unintended consequence a slight amount of lateral flex because of the thinness of the channel.
I got to give it a test ride yesterday in a small but clean south swell we had coming in and all I can say is Iím happy. The spot I was at has a sloping take off with an initial wall section and then gets steep, fast and hollow on the inside. With the nose flex the board caught waves like a dream, had all the speed I needed to beat the wall section and best of all I could pull it up into the pocket on the inside and it would just stick there. Now Iím wondering if the slight lateral flex might have something to do with that. For sure when I let up on the pressure on my outside hand and unloaded the inside rail the board would take off and fly. |
|
| Back to top |
|
 |
bgreen

Joined: 20 Feb 2004
Posts:
Location: Qld. Oz
|
 Posted: Tue Apr 19, 2011 4:56 am Post subject: Posted: Tue Apr 19, 2011 4:56 am Post subject: |
 |
|
RNT808,
Can you post a photo or two? seems like there must be a few paipo riders on Maui.
regards
Bob |
|
| Back to top |
|
 |
RNT808
Joined: 11 Sep 2007
Posts:
Location: Makawao Maui
|
 Posted: Tue Apr 19, 2011 4:52 pm Post subject: Posted: Tue Apr 19, 2011 4:52 pm Post subject: |
 |
|
As soon as I get the hang of posting photos I'll give it a try.
It's an "old dog, new tricks" thing for me, but I'll try. |
|
| Back to top |
|
 |
rodndtube
Dolphin Glider

Joined: 06 Jan 2004
Posts: 690
Location: USA, MD, Baltimore
|
 Posted: Tue Apr 19, 2011 5:26 pm Post subject: Posted: Tue Apr 19, 2011 5:26 pm Post subject: |
 |
|
| RNT808 wrote: | As soon as I get the hang of posting photos I'll give it a try.
It's an "old dog, new tricks" thing for me, but I'll try. |
See: http://rodndtube.com/paipo/forum/viewtopic.php?t=299
_________________
rodNDtube
"Prone to ride"
I love my papa li`ili`i |
|
| Back to top |
|
 |
RNT808
Joined: 11 Sep 2007
Posts:
Location: Makawao Maui
|
|
| Back to top |
|
 |
Uncle Grumpy

Joined: 15 Jan 2007
Posts:
Location: San Clemente
|
 Posted: Thu Apr 21, 2011 6:56 pm Post subject: Posted: Thu Apr 21, 2011 6:56 pm Post subject: |
 |
|
This works better. 
Nifty!

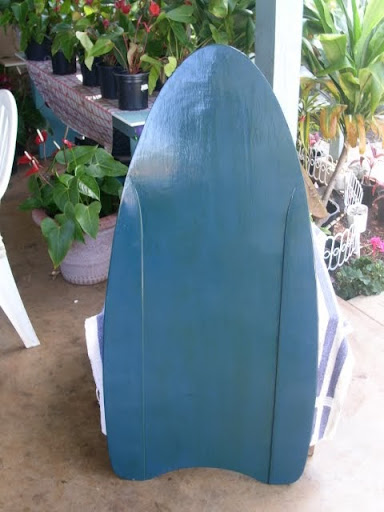
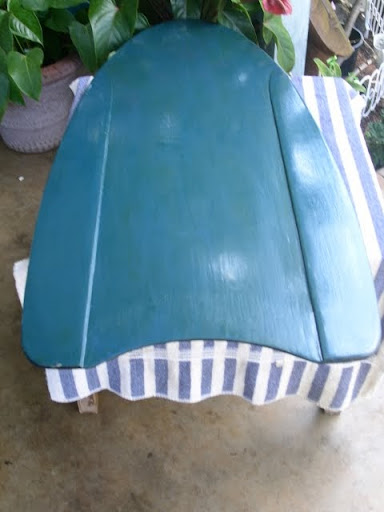
_________________
Prone to ride. |
|
| Back to top |
|
 |
mrmike

Joined: 06 Sep 2007
Posts:
Location: coronado, ca
|
|
| Back to top |
|
 |
RNT808
Joined: 11 Sep 2007
Posts:
Location: Makawao Maui
|
 Posted: Sat Apr 23, 2011 3:29 pm Post subject: Posted: Sat Apr 23, 2011 3:29 pm Post subject: |
 |
|
Uncle Grumpy,
Thanks for the assistance with the pictures. I still canít figure why Iím having problems posting photos.
I follow Rodís instructions to the letter but when I submit all I see is the code and no picture. Itís really got me scratching my head. |
|
| Back to top |
|
 |
Uncle Grumpy

Joined: 15 Jan 2007
Posts:
Location: San Clemente
|
 Posted: Sat Apr 23, 2011 5:39 pm Post subject: Posted: Sat Apr 23, 2011 5:39 pm Post subject: |
 |
|
Happy to do it. 
I know full well how frustrating these dang 'puters can be. 
Looks like a fun board.
Can you actually shove the nose down over the edge like an old school booger?
_________________
Prone to ride. |
|
| Back to top |
|
 |
RNT808
Joined: 11 Sep 2007
Posts:
Location: Makawao Maui
|
 Posted: Sat Apr 23, 2011 6:20 pm Post subject: Posted: Sat Apr 23, 2011 6:20 pm Post subject: |
 |
|
Not quite as much as a sponge. But the area between the nose and beginning of the side pieces and the full length of the channel is only 10mm or a little over 3/8in. so itís pretty flexy. If I push down on the nose it bends a slight reverse rocker into the board and really seems to help in getting over the edge.
It really doesnít show in the pictures but there is a gradual rocker in the board giving the nose about an inch of lift. I have found that a little gradual lift along with putting the wide point farther back makes the board turn a lot better.
This has really turned out to be a fun board. |
|
| Back to top |
|
 |
|
